Sunday, September 30, 2007

I Scrapped Myself Silly!

I have been scrapping up a storm this weekend. There was a cybercrop and I just scrapped myself silly! It was a private crop with proceeds going to the Susan B. Komen Foundation. Below are two of the LOs I completed.

I will have the Monday Musings class up tomorrow evening. We have appointments in the morning which means I won't be able to get to it until the afternoon. It'll be there, though. I promise!

Here are two of the LOs I did this weekend:

Photo Sharing and Video Hosting at Photobucket


I stepped out of my comfort zone with this LO by using orange and wine together. Much to my surprise, it doesn't look too badly! This was my take on a sketch that was given.

Photo Sharing and Video Hosting at Photobucket


This LO has the best PPs - I used the SEI Smarty line. The challenge was to use only one sheet of PP that was printed on both sides. I love this photo of DS & DH.

I have more LOs, but I won't bore you with them, LOL

Have a good one. Come back tomorrow. I'll let you know who won the RAK, too!

Friday, September 28, 2007

Crop for a Cure

This weekend, Happy Scrappin Scrapbooking is having a crop that YOU can be a part of! If interested, please visit the site
http://www.happyscrappinscrapbooking.net. Once there, you can purchase a scrapping kit for a small fee. This will get you into the special crop area. I made an error - when placing your order, type your screen name into the comment box. That's your ticket in! The prizes are wonderful and the activities are fun! Come and join us and CROP FOR A CURE! Let's all play!

Have a good one!

Thursday, September 27, 2007

Life is Good

It is a beautiful day! I'm impatiently awaiting cooler temperatures. It's 81° outside. I want to put some fall things outside, but I don't think the adhesive will stay. I picture my door wreath falling like the autumn leaves - one at a time, until there is nothing left but the grapevine base!

I made pumpkin chocolate chip bread the other day. It was yummy and the scent in the house was fantastic! There are certain things that come with fall - pumpkin, spicy scents, oranges, yellows, olives, and reds. It's a toss up with me whether I love Fall or Winter best. There is a fine line separating them in my book. I love each so much.

I did a LO yesterday that is a take off on one below. I did it to show how the same basic format can be modified. The dark color is navy blue, not black. It clearly looks blue IRL. I love the olive with it. If you figured out how to do the one below, you'll be able to do this one in a snap! Don't you just love the Basic Grey Rub Ons? They are so easy to use.

I will select the winner of the Monday post on Monday. That way, everyone who may wish to leave a comment will still get in there! LOL

Have a good one!

Photo Sharing and Video Hosting at Photobucket

Monday, September 24, 2007

It's About Time!

I apologize for getting this up so late. Here is your LO with directions. It really isn't hard at all as long as you get everything together ahead of time. The colors on the photo aren't exactly true because I took it at night. One shot was too beige and this one was a bit on the gray side.

Photo Sharing and Video Hosting at Photobucket


Materials needed:

1 sheet each of We Are Memory Keepers Precious Metals - Coppered Out - rivets, orbits, and cornice
ColorBox ink in Dark Brown
We Are Memory Keepers Copper rub ons - flowers & flourishes
6 matching buttons
Bazzill flowers (large)
Prima Flowers (small)
Mambi Rhinestone Heart (I cut the outer section to s-t-r-e-t-c-h the use of the embellie.)
We Are Memory Keepers photo corner & ribbon side in antique copper (from hardware collection)
3 Brads (I used 2 Making Memories Antique Copper; 1 WRMK small antique copper from hardware collection)
Queen & Company alphas (for the word "in")
white vellum (optional)
adhesive
sheer ribbon
circle compass

Process:

1. It is so important to get everything together before you start. I had difficulty w/ the tite colors and finally gave up and used my Cricut.

2. Using the circle compass, construct a circle that is 9 1/4".
3. Glue your circle just off center to the base sheet. I have mine up and to the right a bit.
Photo Sharing and Video Hosting at Photobucket

4. Print your photo. Mine is 4 x 7.
5. Cut a strip of ribbon and glue the ends behind the photo. Next, add your bow to the top of the strip. Glue into place.
6. Add your flowers to the "ten o'clock position." Add the six buttons at "two o'clock and "eight o'clock."
7. Now, you are ready for your title. I used white vellum for the word "special." I used my Cricut to cut the aphas.(Base Camp)
8. Next, I used the Cricut (Opposites Attract) for the words "memories" and "time." Glue into place.
9. Add your alphas for the word, "in."
10. Decide the placement of your corner embellishments and place them in position. The rub ons I used are copper colored.
11. Add your bling heart.

Now, was that hard? The important thing to keep in mind is getting everything together ahead of time. There are lots of goodies on this LO and you want everything to work together. I'd love to see what you make. Please let me know where your's is posted!

I hope you liked this little mini lesson.

Photo Sharing and Video Hosting at Photobucket


Don't forget to post a comment on Sunday's entry to get your name in the hat for a great RAK!

Today's Mini Lesson is Coming!

I'm sorry I am so late! Things just got in the way today. I am almost finished doing it and will post ASAP.

Thanks much,

Chris

Sunday, September 23, 2007

It's a Brand New Week!

Oh, this time of the year is just gorgeous! We had lots of rain yesterday. It was beautiful!

I worked on a LO today for five and a half hours. If it could go wrong, it did! It began when I wet the PP in order to make the rolls. The entire sheet buckled. I ironed it. I thought it would help flatten it out. It didn't. I attached it to the CS with the hope that by gluing it, it would flatten out. It didn't. The only thing I didn't try was running it over with the car! By the time I was done the LO, I was so discouraged and didn't like the resulting effect. No matter what I did, I wasn't pleased. Here it is:

Photo Sharing and Video Hosting at Photobucket


The photo was just so beautiful that I wanted to scrap it. What do you think?

I worked on two others since Friday. One is a scraplift (My Boys) of a LO I saw in a magazine. It's funny. I don't scraplift. I've learned two things: 1. It's harder to scraplift than do it yourself , and 2. It never turns out as well as the one you are copying! So, why bother? Here is the lifted one:

Photo Sharing and Video Hosting at Photobucket


When I saw it in the magazine, I fell in love with it. I loved the way the PPs were arranged. The original artist did it in red, pink, and white. Her title was done in a different way. My version is lacking that special something hers had. I'm glad I did it. I love the photos. Our son didn't want to get off that merry-go-round. It was his first time on one!

With the next layout, I just loved the Jenni Bowlin lined paper. I wanted it to be "boyish" even though the paper was a salmon color. I decided by placing a strong print behind it, it would look more "boyish." I like how it turned out.

Photo Sharing and Video Hosting at Photobucket


I hope you will come back for tomorrow's Monday Mini Class. I think you'll find it easy and ending with a great LO!

Now, to see if you're reading my blog, anyone who adds a comment to THIS SPECIFIC POST will be eligible for a RAK from me! I'll place your names in a bowl or something and have DH pull a name out. I'll post the winner here, and we'll go from there. How does that sound?

See you tomorrow! Have a good one!

Thursday, September 20, 2007

Your Secret Life...

This has been circulating in the scrapping community. I thought I'd post it here so you can see just who you may really be - that secret identity. Try it out and have fun!

1. YOUR ROCKSTAR NAME (first pet & current car,) Flappy BMW
2. YOUR DETECTIVE NAME (favorite color & favorite animal,) Red Kitty
3. YOUR SUPERHERO NAME ("The" + your 2nd favorite color & favorite drink,)The Yellow Water That sounds horrible!
4. YOUR TV WEATHER PERSON NAME (The last name of your favorite teacher & a city beginning w/ the same letter,)
Nora Nantucket
5. YOUR GANGSTA NAME (favorite ice cream flavor & favorite cookie) Cinnamon Snickerdoodle
6. YOUR STAR WARS NAME (The first 3 letters of your last name & first 2 letters of your first,)Chrch
7. WITNESS PROTECTION NAME (Your 2 most favorite female & male names,)Brooke Blaine
8. YOUR HIPPY NAME (What you had for breakfast & your favorite tree,) Honeydew Willow
9. YOUR "FLY GUY/GIRL" NAME (First letter of first name & last 3 letters of last name,)C-Sen
10. YOUR NASCAR NAME (the first names of your grandfathers,) Antonio Roberts (I added an "S")
11. YOUR SPY NAME (your favorite season/holiday & favorite flower,) Christmas Pansy
12. YOUR SOAP OPERA NAME (your middle name & favorite city,) Gabrielle Vancouver
13. YOUR CARTOON NAME (favorite fruit & article of clothing you have on + "ie" or "y",) Raspberry Loungie
14. YOUR STRIPPER NAME (name of favorite perfume/scent & favorite candy,)Clinique Mounds **ha, ha, ha**
15. YOUR ROCKSTAR TOUR NAME ("THE" + favorite hobby/craft & favorite weather element + "Tour",) The Scrapbooking
Blizzard Tour


I thought this was hilarious!

Have a good one!

Wednesday, September 19, 2007

It Was a Windy Wednesday

You can tell something in the weather is heading this way. It was very windy today. I guess, it's another sign that Fall is coming.

I worked on a LO today. I have to put the journaling on. I like the colors very much. Tomorrow, I think I'll do the kraft paper with white and see how that comes out. Here's today's scrapping fix:

Photo Sharing and Video Hosting at Photobucket


LAYOUT CHALLENGE: I love to stitch on my layouts. So, I'm challenging you to create a layout with some sort of stitching on it whether it be machine sewing, hand stitching, embroidery, or sewing felt, buttons, or snaps. Who cares if it doesn't look like Martha Stewart's crew did it! YOU did it and that's what matters. I think lines that aren't perfect add character! If you do a layout with stitching, leave a comment with a link to your layout. I'd love to see it as would others!

I love this photo of our son. Don't you just wish you could tie a brick on their heads to keep them from growing up? This boy is such a ray of sunshine to DH and me. DS was placed on the editorial board for the newspaper where he is employed. Congrats, Kid. You "do" us proud! There is also a possibility that he won Editorial of the Year Award for an editorial he wrote for a Las Vegas newspaper! He just makes us so proud! Not too shabby for a mid 20 something! Love you, Son.

I wish I had something brilliant to share from the world of scrapbooking. I don't! I will say that that glue stick I shared the other day is amazing! If you can find it, add some to your supplies. My ric-rack went down without any issues and is on there!!!

Have a good one!

Monday, September 17, 2007

Mother Nature is Preparing for Sleep...

Oh, you can tell it's becoming Fall! We had the windows open until noon today! It was really cool early this morning and warmed up to a perfect afternoon temperature. The weatherman said there was snow in the high Uintas! So, with Fall on my mind, I chose to do a LO for you today with a Fall theme.

Feel free to use these instructions to make your own layout. You are free to link to this page from any forum, etc., if you wish, but please do NOT copy this information and/or photos to use for your own classes/forums/webpages without my permission.
Photo Sharing and Video Hosting at Photobucket


Supplies needed:

1 sheet of Basic Grey Seethe (All of the paper is from the Infuse line. I had a pad w/mini patterns which I used here.)
1 pc., 4" x 6," of Stew (red)
1 pc., 3" x 6," of Invest (stripe)
1 pc., 3" x 6," of Condense (white w/green pattern)
Chatterbox Alphas & photo corners
American Crafts felt flowers
Heidi Swapp large red flower
Prima Fall leaves
Basic Grey rub ons
Color Box Ink - dark moss
Jenni Bowlin journaling card
sewing machine and brown thread
compass
ruler
buttons
adhesive
brads

Select the cardstock and patterned papers of your choice. You will need three pieces of PP along with what you choose for the base. This would be a great LO to use scraps! After cutting your papers to the sizes above, ink the edges. Let dry. Now, place your three sheets on the base paper as shown in the photo below. Do not glue yet.

Photo Sharing and Video Hosting at Photobucket


Take time to make sure your angles are the way you like them. Now, add some glue to the backs of the three cuts so that they stick firmly enough to the back that there isn't a problem when stitching.

Using a ruler, find and mark the center of your base paper. Use your compass to poke a tiny hole from the back to the front so you know where to place the compass. Turn your paper so that the colored side is up. Place the point of your compass in the tiny hole and, with the pencil, draw a circle that intersects all three of the PPs. Mine is 9" in diameter. Make sure you can see your pencil line. Dark is good. It won't show later if you're using dark thread. My thread is dark brown.

Now, you are ready to sew. Using the straight stitch, follow your pencil line all the way around. I began at the corner that is under the large group of flowers in the lower left. Continue around two more times. Try to make your second and third stitch lines just a little off the first line. If you go wide, don't worry! When done, pull your ends through and knot.

Next, select the flowers you will want to place on the stitched circle. Do not attach the flowers yet. You are placing these to determine where to begin your rub ons.

I used rub ons that are long. I used a couple together to add more length and interest. There are rub ons at four locations along the circle. Start applying your rub ons next to the flowers. See photo.

Now you are ready to attach your flowers. When this is done, add your photo. Make interesting corners. On the example below, I used photo corners that matched the alphas as well as buttons which carry the colors.

You're almost done! LOL - Now, add your title and journaling. You are done!

This layout isn't very hard to do. I've listed lots of details so that if questions arise, you'll have answers. I hope you liked this week's class and will return next Monday for another. Let me know how it went!

Photo Sharing and Video Hosting at Photobucket

Sunday, September 16, 2007

And the Emmy Does NOT Go To...

American Crafts! They are on my dirt list! I wrote and told them, too! I was working on a LO the other night. It was all done except for the title. I pulled out my Thickers, selected the Latte font in white, and discovered that they included ONE and ONLY ONE "N" in the package! Now, this wouldn't have been so annoying had there NOT been TWO of the "Q," " Z," " X." There wasn't even a way to create the "N" due to the configuration of the font. Thank goodness I had more packages of that font type.

When I wrote to American Crafts, I stated that if including only one "N" is a marketing strategy, it stinks! I reminded them that they included two of the more obscure alphas. I also shared with them that the letter "N" is used in 47.67% of the words in the English language. Hrrmmppfff!

The weatherman stated that we are finished with the 100° days! Fall is coming to the desert! Thank goodness! DH has four huge potted chrysanthemums by the front door. Each bouquet is about two feet in diameter and about two feet high. There are two yellow and two brown/yellow flower filled pots. They look so pretty. When the weather cools a bit more, I'll hang the fall wreath on the door. I love fall!

Tomorrow (Monday) is a mini lesson, so please come back and see if you'd like to do the layout I am planning to post. I'll be posting in the afternoon as I'll be making it in the morning.

The LO below is of DS and his great grandfather. This was such a special photo, I had to scrap it for DH. Granddad was about 90 when this was taken and passed shortly after. He was very special and so loved.

See you tomorrow for an easy to do layout!

Photo Sharing and Video Hosting at Photobucket

Wednesday, September 12, 2007

I'm Stuck on Glue

Today was a busy day. We drove to Vegas for our dentist appointments, went out to lunch, drove home, and then decided to drive 42 miles north for dinner! My DH & DS love to be behind the wheel! DH was the driver today.

I want to share a wonderful product with you. If you haven't heard of it, it's one you may be interested in getting. I never use glue sticks. When I was teaching, I didn't have them in my classroom either. It was Elmer's all the way! I recently got a glue stick that is super strength! It adheres ribbon to LOs w/out puckering the ribbon. It works beautifully with buttons and metal as well. It is very, very strong. It's made by Pioneer and has the Style #EGS. I've also found that a little goes a long way! Here is the product:

Photo Sharing and Video Hosting at Photobucket


I can't tell you how much it was because I got it at the same time as other items, but I know it wasn't expensive. I know you won't be disappointed! I'm surely not! We, scrappers, need to share these good things!

Have a great one!

Monday, September 10, 2007

Monday Morning Musings

Happy Monday! Fall in not too far off here in the desert. You can feel it coming! It is such a beautiful season rich with photo shoot opportunities. The leaves are beginning to change at the higher elevations. I can't wait for sweater season! Fall is good!

I spent some time looking for my Heidi Swapp acrylic block yesterday. I have no idea where it went. I even kept it in its packaging so it would be easier to see. Well, that didn't work, LOL. I may have accidentally tossed it out. I do that sometimes. Needless to say, I've ordered another one. I'll probably find it today now that I've ordered a second block.

Today, I thought I'd start something new. Each Monday, I thought I'd create a LO and then give you the steps to make one like it. Your feedback will be VERY important. I'd love to know if it was helpful. So, speak up!

Feel free to use these instructions to make your own layout. You are free to link to this page from any forum, etc., if you wish, but please do NOT copy this information and/or photos to use for your own classes/forums/webpages without my permission.

Photo Sharing and Video Hosting at Photobucket


Supplies needed:

1 sheet of red Bazzill cardstock
1 sheet of SEI Smarty Tic-Tac-Toe
1 sheet of SEI Smarty Hopscotch
1 sheet of SEI Smarty Jumprope
SEI Smarty Puff Stickers
Buttons
Alphas
Adhesive

Select the cardstock of you choice. Next, select three complimentary sheets of patterned paper. Decide which design will be the top layer. Cut four strips measuring 11" x 1/2". Decide which paper will be the wider strip. Cut four more. This time, they will measure 11" x 7/8". Lastly, cut your middle strips to 11" x 3/4".

Print your photo to your desired size. The one in my LO is approximately seven inches square. Attach your photo to the center of your CS making sure that sides are even.

Now, you are ready to apply your first three strips. At an angle, position your widest strip just above the photo. Now, apply your 3/4" side strip at yet another angle. Lastly, place the narrowest strip to the top. Glue the center of the strips to each other and then glue to your cardstock at the mid point. Your LO should look like this:

Photo Sharing and Video Hosting at Photobucket


Repeat the same process on the other three sides. Make sure that the strip you selected for the top when you first began is also the same for these three sides. Apply adhesive at the midpoints and then to the cardstock.

Look at your ends. Are there any you want to slip under another? Do a litte "weaving" at the ends, if desired. When you get the look your seeking, glue all strips into place. Now you are ready for the final step.

Photo Sharing and Video Hosting at Photobucket


Your final step is to apply embellishments at the four corners. Select what you want and apply. In my LO, I had a variety of embellies as well as a varied number at each corner. Create your title and place it on your LO the way you prefer. When done, your LO should look like this:

Photo Sharing and Video Hosting at Photobucket


I hope you liked my class! I wish you the best in creating your own LO using this design!

~Chris

Friday, September 7, 2007

I'm Halfway There

Well, thanks to Lauren, I was able to move my slide show from the left to the right! Now, I have to figure out the second half - how to get it to go vertically rather than horizontally! I figure if I add to my blog design, just a little at a time, I should eventually have something worth looking at!

Last night was a first. I worked on a LO for a long time. Murphy's Law came into play. Anything that could go wrong, DID go wrong! I may start all over today. I had ordered some PP from 4 SCRAPPY SISTERS and only had one sheet of the key pattern. That is no longer a paper I can use. I really liked it, too. I've never pitched a LO before.

There is a cybercrop coming up at HAPPY SCRAPPIN' SCRAPBOOKING at the end of September. This crop will be a bit different as it is a Crop for a Cause in support of the Susan G. Komen Foundation. Check it out!!!

Nicholas and Leandra are adjusting to life in Oregon. Mark and I miss him so dearly. I know it is a rite of passage to move away, but it doesn't make it any easier. There are changes and adjustments looming ahead - those holidays we used to spend together - Thanksgiving and Christmas - will now be spent apart. I am so very proud of the man Nicholas has become. As an editor for a Las Vegas newspaper, he gained so much expertise in this area that his new job is allowing him to do editorial work as well. His writing never ceases to amaze me. He has a flair for dry humor, analytical criticism, and assessing situations. He also has courage. I love you, Nicholas...

Thursday, September 6, 2007

The Slide Show That Almost Wasn't!

Well, I just spent some time selecting LOs for a slide show. I went through the process but haven't figured out how to get this vertically and on the right side of my blog. I know I will figure this out eventually, LOL. When I worked on this the first time, I wound up with the frame in the upper left and the slides in the lower right! Both were only 1/2 inch wide! It must be a MAC/PC thing because when I went back and used the second set of steps, it went in just fine. Oh the joys of compatibility issues!

Wednesday, September 5, 2007

Will She or Will She Not Blog?


I am totally clueless as to the process necessary in making an attractive blog. I have attempted a very simple start. This is going to be quite a challenge.

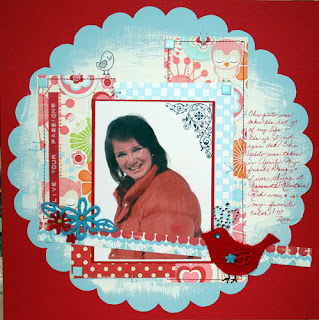
Last night, I completed a LO I had wanted to do after I found this photo of myself. Where did this gal go? I love red, love the PP, and put it all together in this LO. I wish you could see the detail on the little red wing. It is sooo sweet.